Assembling the Radar Sensor
This page will be dedicated to instructions of how to assemble the radar sensor.
Firmware
To load the firmware onto the radar module please follow the following instructions.
The below image is of the back of the radar PCB. Looking from the back of the PCB, there are three sets of 6 pin connections. As labelled in the diagram red, green, and blue. The red connection is used to program and talk to the ATmega it is to be connected to by a bosl programmer probe. The green connection is a duplicate of the red connection however the pin pitch is greater. This is where the sensor cable is soldered. The blue connections is for programming the XM132. It is a serial wire debug interface designed to be connected to by a bosl programmer probe.
To begin to upload the firmware connect the red connection to a 3.3V serial port, connect the blue connection to a SWD debugger, such as the segger J-link.
- To program the XM132, a special firmware for the ATmega need to first be programmed which allows this. This can be done via uploading the following sketch from the Arduino IDE: File:Radar Velocity STM resetremap.zip. For all uploading the to the ATmega please use the ATmega328PB board supplied in the BoSL Boards pack of the arduino board manager, (available here: https://monash-bosl.github.io/BoSL-IDE-Core/)
- The radar firmware can then be uploaded onto the XM132 using the SWD debug probe. The target MCU is the STM32G071CB. The latest release can be found here https://github.com/Monash-BoSL/xm132-radar-firmware/releases/tag/v1.4.0 (use the .hex file)
- The radar firmware can now be flashed onto the ATmega using similar settings to step 1. The radar firmware is available here: File:Radar velocity firmware 1.4.0.zip
- The radar firmware also contains a python script to test that the firmware has been successfully flashed. Open this script to determine if the process was successful. You may need to edit the file to change the COM port which it is using.
After this is done the firmware should be successfully flashed.
Tips and Tricks
To make a batch of uploading go quicker, the final command in the Arduino IDE terminal can be copied to a command prompt for significantly faster uploading. The file used for uploading however will only be present while the Arduino IDE is open.
3D Printing
Testing
Testing should be performed at least at three points during assembly.
- Once after programming,
- Once after the radar pcb has been soldered to the cable
- And once after waterproofing.
Testing after programming and after waterproofing should be done with the testing script provided with the ATmega firmware. Testing after soldering should be done with a multimeter. Each pair of pins on the red connection should be checked to see that they aren't shorted closed, each of the red connection should also have continuity checked with the corresponding wire soldered to the green connection (the end which will be used to connect to the data logger. )
Cabling
Ethernet cable should be used to solder to the sensor, a length of up to 20 m has been confirmed to be working at this time.
- Strip the cable at one end such that 5mm of copper are exposed on each conductor. The exposed lengths should be as even as possible.
- Pass the cable through the cable hole on the sensor case body untill at least 100 mm of cable has been pulled through.
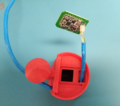
- Solder the cables to the green connection on the radar PCB such that when the PCB is placed in the body, the XM132 will face towards the lens cavity. Solder according to the soldering table, half blue and half brown can be cut off. Ensure that the cable is approximately perpendicular to the PCB
- Use side cutters to cut off any excess cable.
- Apply hot glue to the cables around the solder joint, this ensures that the joints are do not bare any stress from cable movements. The hot glue may case plastic strings, ensure that none of these become attached to the XM132 radar IC.
- Electrically test the connections made as per the testing section.
| Pin | Cable |
|---|---|
| GND | Half Green |
| RST | Orange |
| 3V3 | Green |
| WKE | Half Orange |
| TX | Brown |
| RX | Blue |


